I initially set up my new ASUS RT-AC87U router with PPTP VPN but decided to go for the more secure Open VPN. I followed the instructions for this on ASUS’s website, but I was never able to get it up and running. I took a look around the web and finally I figured out how to make a setup that works. Here is how I did it.
Visit the VPN settings of your router’s interface at http://192.168.1.1/Advanced_VPN_OpenVPN.asp (if you haven’t changed anything this should be the address to use).
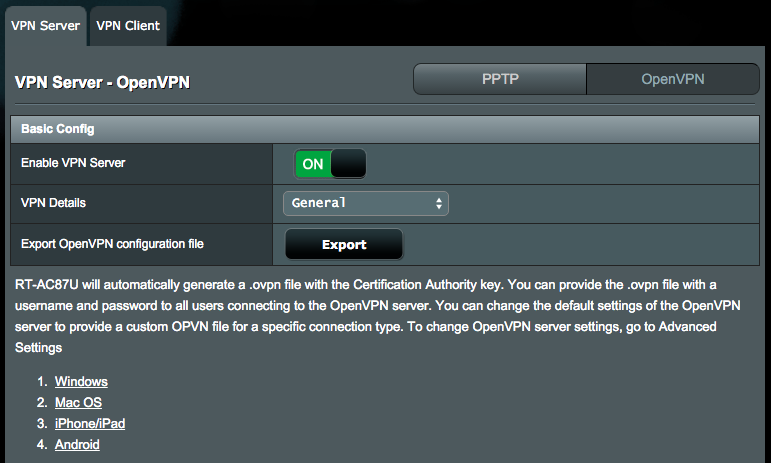
Now, on this page, there should be a link for your OS just as shown on the image below. If you are on a Mac wait a second… Else click the link for your OS.

If you are on a Mac, visit Tunnelblick and download the client. Once you have downloaded go ahead and install it. It will probably ask you if you already have a configuration file – you should say yes to this. Furthermore, it might prompt you if it should check that your IP changes once connected to your VPN. You should ask yes to that as well.
Now, leave Tunneblick for a moment and go back to your router interface. What I initially did was to go to the router interface export the OpenVPN configuration file. Then I put it into a folder and renamed the folder to vpn.tblk. Once I double clicked the folder it would install the configuration in Tunnelblick. Just as the instructions said on the official ASUS tutorials for OpenVPN and Tunnelblick. However, when I tried to connect to the VPN server the connection was rejected.
It turns out that in a recent OpenSSL update DH keys under 768-bit to are no longer allowed to be generated or used.
After searching around for some more info on this, I found a solution on the SmallNetBuilders’s site.
- Make sure your router has the correct TIME.
- Open a terminal and run the following with sudo privileges : openssl dhparam -out dhparams.pem 2048
- Once the certificate is generate open it in a text editor an copy the contents to the clipboard
- In the router interface navigate to Advanced Settings under OpenVPN settings. Under Autorization Mode click the link “Content modification of Keys & Certification.”. In the modal window this brings up you should replace the contents of the “Diffie Hellman parameters” field with the contents in your clipboard.
- Press Save and then Apply. You should now be able to connect to your VPN with Tunneblink or any other OpenVPN client.
If you want to have all your traffic go through your VPN server be sure that yes is selected in “Direct clients to redirect Internet traffic” under Advanced Settings in the OpenVPN part of the router interface. Setting this to yes will make sure that once you connect to your VPN server your IP will change as well.
As a side note I’m not using the Merlin firmware. But I would guess the above would work there as well.
Hi there,
how can I make this work on Windows machines,
“Open a terminal and run the following with sudo privileges : openssl dhparam -out dhparams.pem 2048”?
Thanks
I guess you can run these commands in cmder or Babun.