If you want to use a custom MembershipProvider for Umbraco instead of the built in here is how I managed to connect to a MySQL database, create tables in that database automatically and query the database from Umbraco/C# while the rest of Umbraco uses a SQL databse. You should note that installing a custom MembershipProvider will leave the member section in Umbraco useless.
Preparation
I already had a WAMP stack installed (AMPPS) so I started by starting up the MySQL and through phpMyAdmin I created a new database to store the members. You might want to turn off Apache or change port as it might conflict with other installed localhosts.
You need to have Visual Studio – in my case version 2013 professional. Furthermore you need to have various MySQL components installed. Here is how to install that:
- Download and run MySQL Installer – I selected the smaller of the two files but it shouldn’t matter
- Select Add / Modify Products and Features
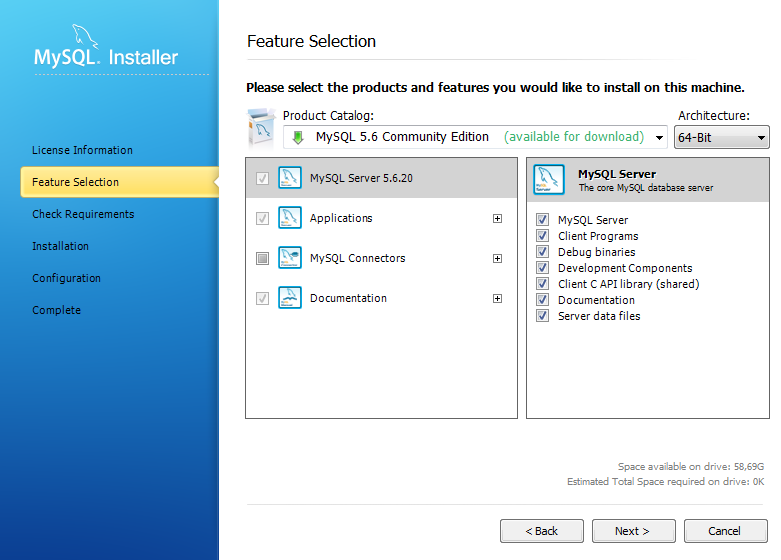
- Once you get the the Feature Selection check the following – I chose MySQL 5.6 Community Edition in the Product Catalog dropdown:
- Under MySQL Server I checked all – this is probably not needed though.
- Under Applications I also checked all though I probably newer need MySQL for Excel for instance.
- Under MySQL Connectors I also checked all. I guess, though, that I only need Connector/Net
- Under Documentation I also check all

Installing Umbraco, MySQL.Data & MySQL.Web via NuGet
- Open Visual Studio and create a new empty ASP.Net Empty Web Application (or ASP.Net MVC 4 Web Application – then choose empty when prompted)
- Open Package Manger from Tools > NuGet Package Manager > Manage NuGet Packages for Solution…
- Search for UmbracoCms and press install. This will install Umbraco
- Once Umbraco is installed run it in you local environment by pressing CTRL+F5. This should take you to the install screen. Be sure to not install a starter kit! Finish the installation and get back to Visual Studio. You should now have a completely empty Umbraco installation.
- It is a good idea to take a backup of you current Web.config file now. You might need to get back to the default settings once or twice.
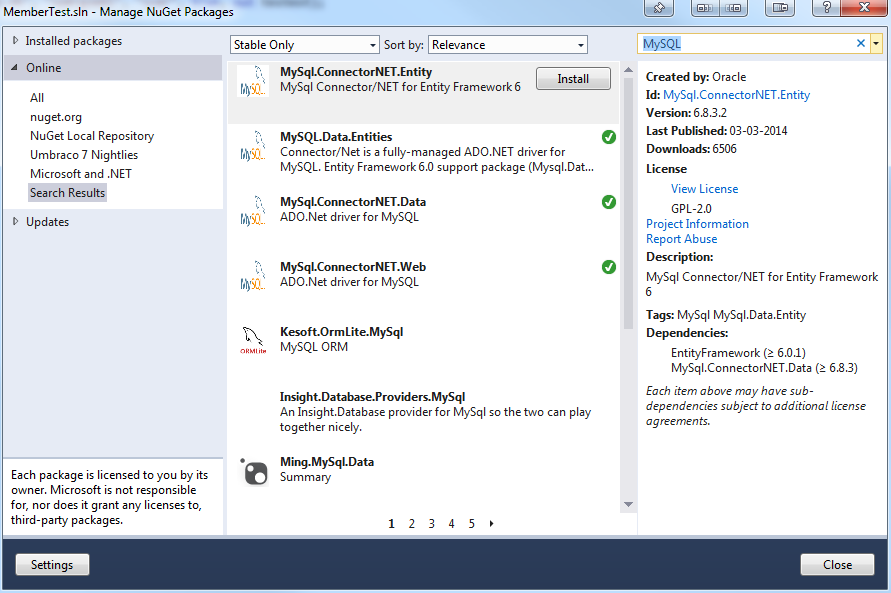
- Open the Package Manager again and search for MySQL. Install the MySql.ConnectorNET.Data and MySql.ConnectorNET.Web (No need to instal MySQL.Data.Entities as the image below illustrates)

- Don’t run your site yet as you will not get an error when you try to log in to the back office.
- Open Web.config and make the following changes:
- Under <system.data><DbProviderFactories> remove the first double entry of
<add name="MySQL Data Provider" invariant="MySql.Data.MySqlClient" description=".Net Framework Data Provider for MySQL" type="MySql.Data.MySqlClient.MySqlClientFactory, MySql.Data" />
- Also under <system.Data><DbProviderFactories> change:
<remove invariant="MySql.Data.MySqlClient" name="MySQL Data Provider"/>
to
<remove invariant="MySql.Data.MySqlClient" />
- Under <connectionStrings> add the following lines
<remove name="LocalMySqlServer" />
<add name="LocalMySqlServer" connectionString="Data Source=localhost;user id=root;password=mysql;database=umbraco_member;" providerName="MySql.Data.MySqlClient" />
You might need to change LocalMySqlServer to whatever is used as connectionStringName in your Web.config. Also, change the Data Source, user id, password and database as needed.
- Under <system.web> change the defaultProvider in the following line:
<membership defaultProvider=”UmbracoMembershipProvider” userIsOnlineTimeWindow=”15″>
to the name of your defaultProvider – in my case MySQLMembershipProvider:
<membership defaultProvider=”MySQLMembershipProvider” userIsOnlineTimeWindow=”15″> - Under <system.web> change the defaultProvider in the following line:
<roleManager enabled=”true” defaultProvider=”UmbracoRoleProvider”>
to the name of your defaultProvider – in my case MySQLRoleProvider:
<roleManager enabled=”true” defaultProvider=”MySQLRoleProvider”> - Under <system.web><profile><providers> add <remove name=”MySQLProfileProvider” />
- Under <system.web><membership><providers> add autogenerateschema=”true” to the tag named MySQLMembershipProvider so it will look somewhat similar to this
<add name="MySQLMembershipProvider" type="MySql.Web.Security.MySQLMembershipProvider, MySql.Web, Version=6.8.3.0, Culture=neutral, PublicKeyToken=c5687fc88969c44d" connectionStringName="LocalMySqlServer" autogenerateschema="true" enablePasswordRetrieval="false" enablePasswordReset="true" requiresQuestionAndAnswer="true" applicationName="/" requiresUniqueEmail="false" passwordFormat="Clear" maxInvalidPasswordAttempts="5" minRequiredPasswordLength="7" minRequiredNonalphanumericCharacters="1" passwordAttemptWindow="10" passwordStrengthRegularExpression=""/>
- Also add autogenerateschema=”true” to the tag named MySQLRoleProvider under <system.web><roleManager><providers>
- Finally add autogenerateschema=”true” to the tag named MySQLProfileProvider under <system.web><profile><providers>
- Under <system.data><DbProviderFactories> remove the first double entry of
- Run Umbraco by pressing CTRL+F5. If everything works, this will auto generate your database tables in your MySQL database. You should now be able to log in. Note that everything should work except the member section. This, of course, doesn’t work as we have explicitly said that we wanted to use a different provider for membership.
Basic member stuff to see that it is working
- Create a DocumentType and a template. Then create a document in the root of your site. Write something in the template to confirm it is all working.
- Inserting the following and you should be able to create and retrieve a member
@inherits Umbraco.Web.Mvc.UmbracoTemplatePage
@{
    <h2>Username for member with email "hello@world.com"</h2>
    //will show get the username from the email. This will be empty if not created.
    string userName = Membership.GetUserNameByEmail("hello@world.com");
    @userName;

    <h2>Create a member</h2>
    //will create a user
    MembershipCreateStatus membershipCreateStatus;
    Membership.CreateUser("my name", "MySuperSecretPassword!", "hello@world.com", "secret question", "secret answer", true, out membershipCreateStatus);
    //print out creation status
    @membershipCreateStatus
}