Backup sd card to your mac
Insert the SD card in a card reader on your Mac. Open Terminal and type
diskutil list
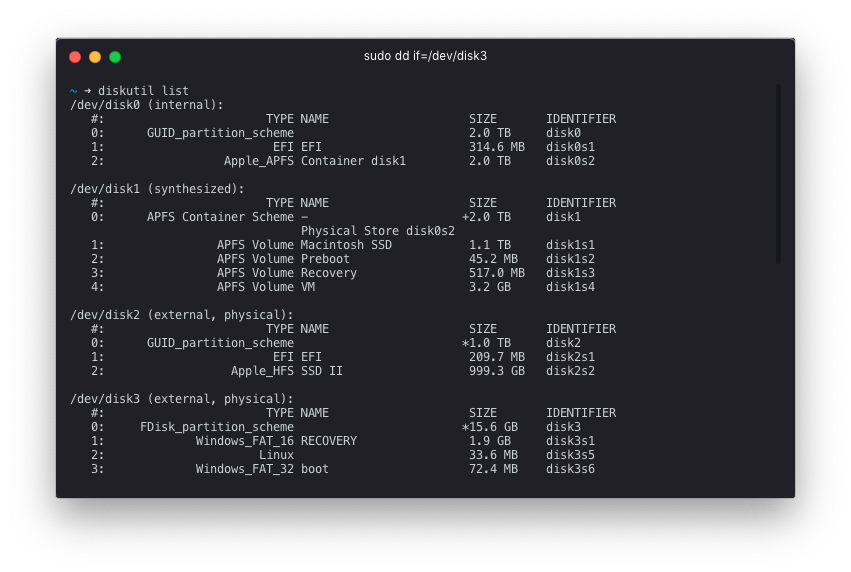
This will list all disk on your Mac and should show something like on the image below (not that I’m using Hyper instead of the native Terminal):

You can find your SD card by looking for the right size. In this example, the SD card is /dev/disk3.
Now, in Terminal, create a folder to store your disk image.
You are now ready to create the backup of your Raspberry Pi SD card. Do this by executing the following command. Replace disk3 with the disk you found in the above step. Also, replace [your-user-name] with your username.
sudo dd if=/dev/disk3 of=/Users/[your-user-name]/raspberry-pi-backup/SDCardBackup.dmg
This will begin the backup process. There will be no feedback until the backup is complete so give it time. It can easily take more than ten minutes. Once complete, the prompt will reappear in the Terminal window.
Restore sd card from your mac
If you need to restore your backup this can be done in a couple of simple steps.
Insert the card you want to write to and unmount it using the following command. Remember to replace disk3 with your disk name (found using diskutil list – see above):
diskutil unmountDisk /dev/disk3
You can then use this command to write the image back to the SD card:
sudo dd if=/Users/[your-user-name]/raspberry-pi-backup/SDCardBackup.dmg of=/dev/disk1
When completed, you can remove the SD card from your Mac using the following command:
sudo diskutil eject /dev/disk3
You should now have a restored SD card that you can put back in your Raspberry Pi